How to Germinate Seeds: Soil vs. Paper Towel Method Explained
Published on
January 3rd, 2025

Why Germinate Seeds at Home?
Germinating seeds at home offers many benefits, especially for gardeners seeking more control and cost efficiency. Purchasing fully grown seedlings from a nursery can quickly add up, especially if you're planting a large garden. In contrast, growing your plants from seeds saves money. It offers a wider variety of options, including heirloom, hybrid, and organic vegetable seeds, often unavailable as store-bought seedlings.
Beyond financial savings, starting seeds indoors allows you to monitor and optimize the growing environment. Controlling temperature, moisture, and light exposure can improve germination rates and ensure your plants get the best possible start. Additionally, growing from seed helps avoid potential issues with pests or diseases that may come with nursery plants.
Indoor seed starting is particularly useful for gardeners planning their vegetable gardens early. Starting seeds indoors gives you a head start, allowing your plants to mature faster and extend the harvest window.
In short, germinating seeds at home is an economical, practical, and rewarding way to grow a garden tailored to your needs.
Shop Garden Seeds Online!
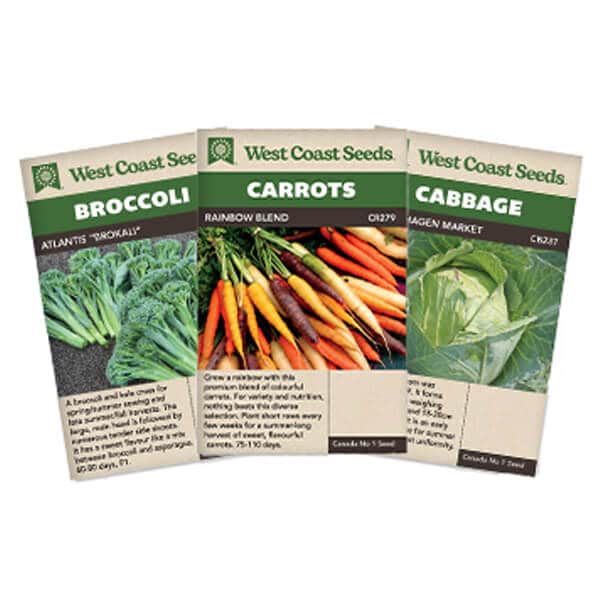
Van Beek's has an extensive selection of vegetable seeds, fruit seeds, and flower seeds available to buy online.
Shop NowWhen to Start Seeds Indoors
Timing is everything when it comes to starting seeds indoors. Begin too early, and your seedlings may become root-bound or leggy from a lack of space and light. Start too late, and your plants will need more time to mature before the end of the growing season. This is especially important for gardeners in areas with shorter growing seasons, such as Ontario, where every frost-free day counts.
We have an article dedicated to when to start growing seeds indoors, with all the information you need to time your planting properly.

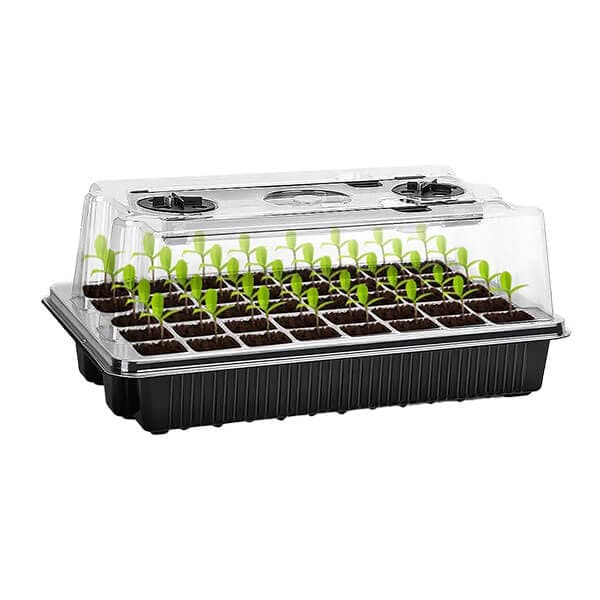
Using a Seed Starter Kit
A seed starter kit or tray makes it easier to manage your seedlings by providing individual cells for each seedling to grow in. This reduces the need to thin plants later and makes transplanting more efficient.
Proper timing and the right tools will help you make the most of your growing season and ensure a bountiful harvest.
What You'll Need: Recommended Seed Starting Supplies
To get started, gather the essential tools:
- Seed starter tray for proper seedling organization
- High-quality, lightweight soil mix or a soil-less blend
- Grow lights or LED lights to support plant growth
- Heat mats to encourage warm-season crops like peppers and tomatoes
Van Beek's offers a vegetable seed starter kit which includes: seed starter trays, humidity domes, grow light bars, 5 packs of our most popular vegetable seeds, and premium potting soil. This kit is beginner-friendly and gives you everything you need to get your vegetable garden started!

Soil vs. Paper Towel Method: Overview of Both Techniques
These two germination methods offer distinct advantages:
- Soil Germination: Mimics outdoor planting conditions, reducing transplant shock.
- Paper Towel Germination: A faster, space-saving technique that allows close monitoring of the sprouting process.
Depending on your goals and available space, you can use one or a combination of both methods.
How to Germinate Seeds in Soil

Step-by-Step Process
1. Prepare the Seed Starter Tray
- Use a seed starter tray filled with lightweight seed starting mix or soil-less blend. Ensure the soil is sterilized to prevent fungal diseases.
2. Moisten the Soil
- Before planting, moisten the soil so it is damp but not soaked. Proper moisture helps seeds absorb water without drowning them.
3. Plant the Seeds at the Correct Depth
- Check the seed packet instructions for depth guidelines. Generally:
- Tiny seeds: Lightly cover with a thin layer of soil.
- Large seeds: Plant about ½ inch deep.
- Be cautious not to plant too deeply, as this may prevent sprouting.
4. Water the Seeds from the Bottom
- Place the tray in a shallow pan filled with water to allow the soil to absorb moisture from below. This method prevents the seeds from being displaced by top watering.
5. Provide Warmth and Light
- Place the tray in a warm area or use a heat mat for heat-loving crops. Provide 12–14 hours of light daily using grow lights or natural light from a south-facing window.
6. Monitor and Mist Regularly
- Keep the soil moist but not saturated. Mist the soil lightly if the top layer feels dry. Avoid overwatering, which can lead to fungal issues.
7. Thin Seedlings, if Necessary
- If multiple seeds sprout in a cell, trim the weaker seedlings with scissors to prevent overcrowding and ensure the strongest plants thrive.
8. Prepare for Transplanting
- When the seedlings have grown their first true leaves, they can be transplanted into larger pots or directly into the garden.
Pros and Cons of Soil Germination
Pros:- Reduces transplant shock by mimicking natural conditions
- Easy transition to outdoor planting
- Requires more space and setup
- Must carefully monitor moisture and light levels
How to Germinate Seeds in Paper Towels

Step-by-Step Process
1. Moisten the Paper Towel
- Take a paper towel and dampen it with water until it's moist but not dripping. Too much water can cause mould or rot.
2. Place the Seeds Inside the Towel
- Spread the seeds evenly on one-half of the paper towel. Fold the other half over the seeds to cover them.
3. Store in a Plastic Bag
- Place the folded paper towel inside a resealable plastic bag. Seal the bag, leaving a small air gap for airflow. The bag creates a greenhouse effect, trapping moisture and warmth.
4. Place the Bag in a Warm Area
- Store the bag in a warm, dark place on top of a refrigerator or near a heater. Most seeds germinate best at temperatures between 65–75°F (18–24°C).
5. Check Daily for Germination
- Inspect the paper towel daily to ensure it remains moist. Add a few sprays of water if needed. Depending on the seed type, you should start seeing sprouts within 5–7 days.
6. Handle Sprouts Carefully During Transplant
- Once the seeds have sprouted, it's time to transplant them. Use tweezers to gently move the sprouted seeds into a seed starter tray or pot filled with moist soil.
- Avoid touching the roots directly to prevent damage. If the root grows into the paper towel, cut around it and plant it with the seed.
7. Cover the Sprouts Lightly with Soil
- Place the sprouted seeds gently on the soil and cover them with a thin layer. Mist the soil to keep it moist until the seedlings establish themselves.
Pros and Cons of Paper Towel Germination
Pros:- It saves space and allows for close monitoring of germination
- Faster results due to controlled moisture and temperature
- Requires careful handling of delicate sprouts during transplanting
- More labour-intensive due to multiple steps
Hardening Off and Transplanting Your Seedlings

Before transplanting your seedlings outdoors, they must undergo a process called hardening off. Start by placing the seedlings outside for 30 minutes on the first day, gradually increasing the exposure time over two weeks. This acclimates them to outdoor conditions like sunlight, wind, and temperature fluctuations, reducing transplant shock.
Common Mistakes When Germinating Seeds and How to Avoid Them
Even experienced gardeners can encounter challenges with seed germination. Understanding common mistakes and how to avoid them will increase your success and prevent frustration.
1. Overwatering or Underwatering
One of the biggest pitfalls is incorrect watering. Overwatering can suffocate seeds, promote mould, and cause fungal diseases like damping-off, where seedlings suddenly wilt and die. On the other hand, letting the soil dry out can delay germination or kill tender sprouts.
Solution:
- Use a seed starter tray and water from below to ensure the soil stays moist but not saturated.
- Monitor the soil daily and mist if the top layer feels dry.
2. Planting Seeds Too Deep
Each seed type has an optimal planting depth, usually mentioned on the seed packet. Planting too deep can prevent the seed from getting the air and light it needs to sprout while planting too shallow can dry out the seed.
Solution:
- Follow the packet instructions and use the guideline: No deeper than 3 to 4 times the seed's diameter.
- If unsure, it's better to plant too shallow than too deep.

3. Skipping the Hardening-Off Process
Moving seedlings directly from indoors to the garden can shock them. This "transplant shock" occurs when seedlings are suddenly exposed to outdoor conditions like direct sunlight, wind, and temperature changes, causing their growth to slow or even stop.
Solution:
- Gradually introduce seedlings to the outdoors over 10–14 days by placing them outside for a few hours each day, gradually increasing exposure.
- Start with shade, then slowly introduce them to sunlight to avoid burning delicate leaves.
4. Using Old or Low-Quality Seeds
Using expired or improperly stored seeds can lead to low germination rates and weak seedlings. While it's tempting to use leftover seeds, their viability decreases with time, especially if not stored in cool, dry conditions.
Solution:
- Test old seeds with paper towels before planting to check their viability.
- Invest in fresh organic vegetable seeds for the best results.
5. Inadequate Light Exposure
More light is needed for indoor seedlings. Without enough light, seedlings grow tall and leggy as they stretch toward the light source. This makes them weak and prone to breaking.
Solution:
- Place seedlings in a south-facing window or under grow lights for 12–14 hours daily.
- Adjust the light so it's close to the plants (within 2–3 inches) to prevent leggy growth.
6. Starting Seeds Too Early
Many gardeners need to start seeds earlier, thinking it will give them an even greater head start. However, plants can quickly outgrow their indoor space and become root-bound, stunting their growth when transplanted.
Solution:
- Stick to the recommended indoor planting times based on your area's frost dates.
Frequently Asked Questions