Shop Patio Pavers Online!
Van Beek's has an extensive selection of patio paver stones. Find the perfect style and colour for your project. Shop online today.
Shop Now Installing a patio with patio pavers is a rewarding and practical way to enhance your outdoor living space. Whether you're a DIY homeowner or a small contractor, following the proper steps will ensure a professional and long-lasting installation.
This guide will walk you through every phase of the process, from planning and excavation to laying pavers and sealing the surface.
Tools and Equipment:
Before you begin, gather the essential tools:
- Measuring & Layout Tools: Tape measure, mason’s line, and stakes
- Excavation Tools: Shovel and wheelbarrow
- Compaction Tools: Hand tamper
- Levelling tools: Screed bars and level
- Cutting tools: Masonry saw, chisel
- Installation tools: Rubber mallet, push broom, hose
Landscaping Materials:
You'll need the following materials:
Step 1: Planning & Measuring Your Patio
Proper planning is the most critical step of the patio installation process. Before you break ground, take the time to carefully measure your space, determine how you will use it, and anticipate any challenges.
Determining the Right Patio Size
One of the first decisions you need to make is how big your patio should be. A patio that’s too small may feel cramped, while an oversized patio might dominate your yard unnecessarily. Answering the following questions will help determine the best size:
How much space do you have?
- Measure your available yard space and consider how much of it you want to dedicate to a patio.
- A small patio is about 140-150 square feet
- A large patio is a minimum of 250 square feet
How do you plan to use the patio?
- Will you be placing a dining table, a firepit, or an outdoor seating area?
- A dining space for six people should be at least 12’ x 12’ to allow for chairs and movement.
- If adding a firepit, consider a circular patio at least 15 feet in diameter for safe clearance.
Do you want the patio in the shade or sun?
- Observe how the sun moves across your yard throughout the day.
- A shaded patio is ideal for hot summer months, while a sunny patio is great for cooler climates.
Will the patio provide access to other areas?
- If the patio connects to a walkway, garden, or driveway, make sure there’s enough clearance for people to move comfortably.
- Consider adding pathways if the patio is part of a larger landscape design.

Measuring the Patio Space
Once you've determined your patio size, use a tape measure to mark the length and width of the area. Multiply these numbers to calculate the square footage of your patio.
Example: If your patio will be 12 feet wide by 15 feet long, the total square footage is:
📏 12 ft x 15 ft = 180 sq. ft.
This measurement is essential because it determines:
- How many patio stones or patio pavers you need
- How much paver base and paver sand is required
- How much landscaping fabric to purchase
Using the Van Beek’s Product Calculator
To accurately estimate your materials, use our product calculator to determine how much base material and sand you'll need. We recommend:
✅ 4 inches of bedding gravel (to provide a strong foundation)
✅ 2 inches of concrete sand (for a smooth, level surface)
💡 Pro Tip: Always order 10% more materials than calculated to account for cutting and adjustments.
Step 2: Preparing the Site – Excavation

Once you’ve finalized your patio size and gathered your materials, the next step is to prepare the site. Excavation ensures that your patio will have a solid foundation and proper drainage.
Marking the Patio Area
- Outline the patio perimeter using marking paint or wooden stakes.
- Use mason’s line to create a straight guide for excavation.
- Mark an additional 6-inch border beyond the patio edge to allow room for edge restraints.
Excavation
- Remove grass, roots, and debris from the patio area.
- Dig to the appropriate excavation depth (typically 7–9 inches).
- Check for existing drainage issues and adjust accordingly.
- Compact the soil using a plate compactor to prevent settling.
💡 Pro Tip: If adding utilities for a fire pit or outdoor kitchen, install conduits before placing gravel.
Step 3: Base Installation – Creating a Strong Foundation
A well-prepared base is crucial for preventing shifting, settling, and uneven pavers over time. Skipping or rushing this step can lead to costly repairs down the road, so take the time to build a solid foundation using the right materials and techniques.

Install Geotextile Landscape Fabric
Before adding your gravel base, install Geotextile Fabric over the excavated area. This fabric is a must-have for long-term durability because it:
✔ Prevents the mixing of soil and gravel, maintaining base integrity.
✔ Reduces weed growth, making patio maintenance easier.
How to Install Geotextile Fabric:
- Cut the fabric to fit the entire patio area, ensuring full coverage.
- Overlap the edges by at least 12 inches to prevent shifting.
- Secure the fabric in place with landscape staples or pins.
💡 Pro Tip: If your soil is sandy or prone to erosion, a geotextile layer is especially important to prevent base washout over time.

Add and Compact the Gravel Base
We recommend using 3/4 Clear Gravel for the base material because it provides:
✔ Superior drainage, preventing water from pooling under your patio.
✔ Better compaction, leading to a firm and stable foundation.
Base Installation Steps:
- Spread a 2-inch layer of 3/4 Clear Gravel over the geotextile fabric.
- Compact the gravel using a plate compactor or hand tamper.
Why Compact in Layers?
- Compacting each layer separately prevents future settling.
- A loosely packed base will shift over time, causing pavers to sink.
💡 Pro Tip: Lightly spray the gravel with water before compacting to help bind particles together for a stronger base.
Ensure Proper Slope for Drainage
A patio needs a slight slope to ensure water drains away from the house or foundation.
How to Check Slope:
- Place a screed bar or long 2x4 board over the base
- Use a level to ensure the patio has a 1.5–2% slope.
- This means the patio should drop 1 inch for every 8 feet of length.
Step 4: Bedding Layer – Preparing for Paver Installation

The bedding layer is the final layer before laying your patio pavers. It provides a smooth, level surface for the pavers to sit on and helps ensure they remain stable over time.
Properly installing this layer is crucial because any uneven spots can lead to wobbly pavers, improper drainage, or shifting over time.
Choosing the Right Bedding Material
We recommend a 2-inch layer of High Performance Bedding (HPB) or Concrete Sand.
High Performance Bedding (HPB)
- Made from ¼” clear stone chips.
- Excellent drainage since it doesn’t retain water.
- Self-compacting, meaning it requires minimal tamping.
Concrete Sand
- Traditional bedding material used in most paver installations.
- Contains fine grains that interlock, providing a firm base.
- Requires compaction to prevent shifting.
How to Install the Bedding Layer
Spread the Bedding Material
- Pour a 2-inch layer of HPB or Concrete Sand over the pipes.
- Use a shovel and rake to spread the material evenly.
💡 Pro Tip:Do not walk on the bedding material after spreading it—this can cause uneven spots
Screed the Bedding Layer for a Perfectly Level Surface
- Use a screed board or long 2x4 to pull across the pipes, smoothing the surface.
- Continue screeding until the entire area is even and level.
- Check with a level.
💡 Pro Tip: Do NOT compact the bedding layer—this layer should remain loose so that the pavers can settle evenly.
Step 5: Laying the Pavers

Now that your bedding layer is perfectly leveled, it's time to lay the pavers. This is where your patio starts taking shape. Proper installation ensures a smooth, level surface that will last for years without shifting or settling.
Getting Started: Setting Up for Success
Before you begin laying the pavers, take a moment to:
✔ Inspect your pavers – Check for any damage or color variations. ✔ Organize your materials – Have pavers stacked near the work area for easy access.
💡 Pro Tip:If your pavers are from different production batches, minor color variations may exist. Blending from multiple pallets helps create a more natural look.
Start Laying Pavers from the House Outward
Always begin laying pavers against a fixed surface, such as:
- The house (if the patio is attached).
- An existing walkway or driveway.
- A retaining wall or other fixed landscape feature.
This approach reduces the number of cuts required and helps maintain a straight and uniform layout.
💡 Pro Tip: If your patio does not start against a structure, lay a perfectly straight row as your baseline before continuing outward.
Lay the Border Pavers First
Installing border pavers first helps:
✔ Define the patio’s edges and keep the layout organized.
✔ Secure the patio by creating a stable perimeter.
✔ Minimize unnecessary cuts when laying the main pavers.
If your design includes a different colour or style for the border, ensure it aligns properly with the main paver field.
Lay the Main Pavers in Your Chosen Pattern
- Work outward from the baseline, placing each paver snugly against the next.
- Use a string line to keep rows straight as you lay more pavers.
- Check alignment every few rows to ensure the pattern remains consistent
💡 Pro Tip: If your paver design includes a border or accent row, lay those first and work inward to maintain clean, straight lines.
Tap Each Paver with a Rubber Mallet
After placing each paver:
- Use a rubber mallet to gently tap it into place.
- Ensure even seating so all pavers sit flush with the surface.
- Do NOT step directly on freshly laid pavers to avoid shifting the bedding material underneath.

Cutting Pavers for a Perfect Fit
At some point, you’ll need to cut pavers to fit around edges, curves, or obstacles.
- Use a Masonry Saw or Wet Saw for precise cuts.
- For small cuts, a Hammer & Chisel works well
- Always wear safety gear (goggles, gloves, mask) when cutting.
💡 Pro Tip: When cutting, measure and mark the pavers slightly larger than needed. You can always trim more, but you can't add material back!
Step 6: Installing Edge Restraints
Brick Edging will hold the pavers in place.
Plastic or Metal Edging Installation:
- Install along the base, not the bedding layer.
- Secure with 10-inch spikes every 12 inches.
Mortar Edge Restraint Installation:
- Apply reinforced mortar along the perimeter.
- Use geo-grid for added stabilization.
Step 7: Compacting the Patio
🔹 Run a plate compactor over the pavers at least three times in different directions.
🔹 Avoid using joint sand before compacting to prevent surface damage.
💡 Pro Tip: Use a rubber roller compactor or a compactor with a polyurethane pad to prevent scuffing.
Step 8: Joint Sand & Sealing the Pavers

Once your paver patio is installed, the final step is to secure the pavers and protect the surface. Applying polymeric sand to the joints and sealing the pavers will enhance durability, prevent weed growth, and add a polished finish to your outdoor space.
This step is essential for long-term stability and low maintenance, ensuring your patio remains beautiful and functional for years to come.
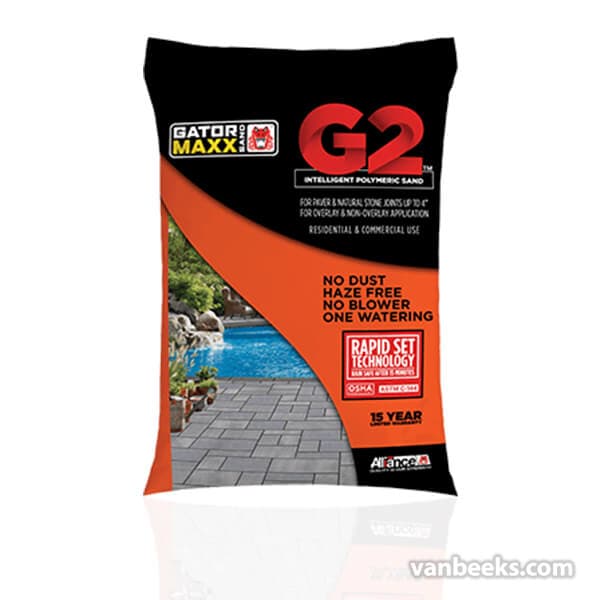
Polymeric Sand
Polymeric sand is a fine, specially formulated sand that contains binding agents (polymers). When exposed to water, these polymers harden and lock the pavers in place, preventing shifting, weed growth, and insect infestations.
Why Use Polymeric Sand?
✅ Locks pavers together, preventing movement over time.
✅ Prevents weed growth between the joints.
✅ Minimizes water erosion, reducing the need for future reapplications.
✅ Deters ants and other insects from burrowing under the pavers.
✅ Available in multiple colors to enhance the overall design of your patio.
Installation Steps:
- Sweep sand into the joints.
- Lightly mist with water to activate the bonding agent.
- Repeat until joints are completely filled.
Patio Sealant (Optional)
- Protects pavers from stains and fading.
- Choose a wet-look or natural finish based on preference.

Frequently Asked Questions (FAQs)
How deep should I dig for a paver patio?
You should excavate 7–9 inches deep to allow space for the base, sand, and pavers.You should excavate 7–9 inches deep to allow space for the base, sand, and pavers.
Use 3/4 clear gravel for drainage and limestone screening or concrete sand for leveling.How do I ensure proper drainage for my patio?
- Slope the patio 1 inch every 8 feet away from buildings.
- Use clear gravel instead of packed soil beneath the base.