How to Prepare Your Lawn & Garden for Spring: The Complete Guide
Published on
April 17th, 2025

Spring is the most crucial season for lawn and garden preparation. After months of harsh winter conditions, your outdoor space needs care and nourishment to ensure a lush, green lawn and a thriving garden.
Whether you’re a homeowner, a DIY gardener, or a contractor, this complete spring checklist will guide you through essential tasks like cleaning up, improving soil quality, top dressing, overseeding, fertilizing, mulching, and edging.
Let’s dive into the step-by-step process to get your lawn and garden spring-ready!
Shop Garden Supplies Online!
Van Beek's has an extensive selection of flower seeds, soil, manure and everything you need for your garden available to buy online.
Shop NowSection 1: Spring Garden Cleanup & Preparation
1.1 Clean Up Your Garden & Remove Winter Debris
Winter leaves behind fallen branches, dead leaves, and plant debris that can smother new growth. Start by clearing garden beds and lawn surfaces with a sturdy Garden Rake.
✅ Steps to clean up:
- Remove dead leaves, twigs, and plant debris that can harbor pests and diseases.
- Trim perennials and shrubs to encourage healthy regrowth.
- Inspect trees and bushes for winter damage, cutting away dead branches.
- Rake up compacted thatch from the lawn to allow better air circulation.
- If you have hardscaping elements like garden walls or edging, check for any shifting or cracks. Repair or replace damaged features.

1.2 Improve Soil Quality for a Thriving Garden
Understanding Soil Types & What a Healthy Garden Needs Your garden’s success starts with healthy soil. The texture, composition, and nutrient levels of your soil determine how well plants grow, how much water they retain, and how resistant they are to drought and disease.
Soil is typically classified into six main types:
- Clay Soil - Retains water well but compacts easily, making it difficult for roots to penetrate.
- Sandy Soil - Drains quickly and warms up fast in spring, but lacks nutrients.
- Silt Soil - Holds nutrients well but compacts easily.
- Peaty Soil - High in organic matter, making it fertile but often too acidic for some plants
- Chalky Soil - Free-draining but alkaline, which can limit the availability of some nutrients.
- Loamy Soil - The ideal soil for most gardens, balancing clay, sand, and silt for optimal water retention, drainage, and fertility.
Learn about all the types of soil, and which ones are best for your lawn and garden in our in-depth guide.
For a thriving garden, your soil should be loamy, nutrient-rich, well-draining, and filled with beneficial microbes. Over winter, soil loses nutrients, and compaction reduces aeration, so it’s crucial to refresh and amend your soil before planting.

✅ How to Test and Improve Soil Quality:
- Test Your Soil pH & Nutrients – Use a test kit or send samples to a lab to determine pH balance and nutrient levels.
- Enhance Soil Fertility – Based on test results, add:
- GardenPro Soil: for a rich, well-balanced foundation.
- Compost: to improve soil structure and microbial activity.
- Manure: to increase nitrogen levels for plant growth.
- Loosen compacted soil –Use a Garden Shovel or tiller to aerate the soil for better water retention and drainage.
Read this article on how to test and improve your soil for more information.
Pro Tip: Healthy soil should have a crumbly texture, be dark in colour, and have a rich earthy smell.
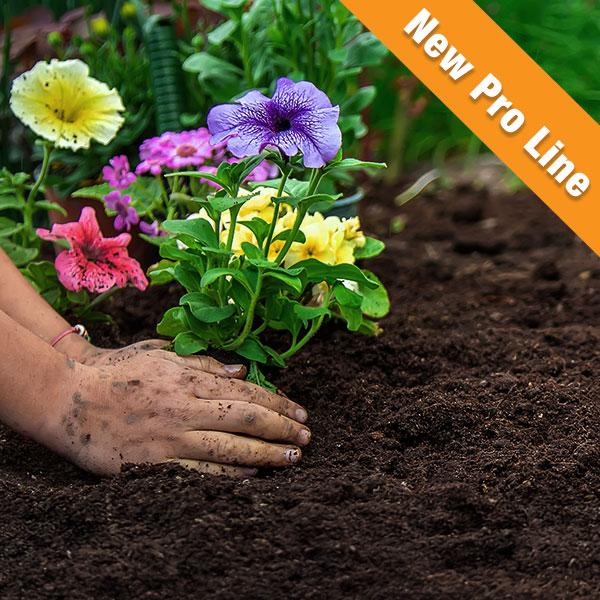
1.3 Plan & Prepare Your Spring Plantings

The Importance of Planning Your Spring Garden
Spring is the perfect time to refresh and expand your garden with new plants, flowers, and vegetables. However, proper planning ensures your garden is well-organized, visually appealing, and easy to maintain.
One of the most important spring gardening tasks is dividing and transplanting perennials. Over time, perennials can become overcrowded, leading to reduced flowering and weaker plants. Dividing them not only rejuvenates old plants but also allows you to fill in empty garden spaces without purchasing new plants.
Planting new annuals are also a great way to add colour, texture, and variety to your flower beds and planters. Unlike perennials, annual flowers bloom continuously throughout the season, making them a fantastic choice for borders, hanging baskets, and garden beds. See our breakdown of the best perennial and annual flowers.
✅ Spring Planting Tasks:
- Divide overgrown perennials such as hostas, daylilies, and irises. Replant in different areas or share with neighbours.
- Plant new annuals such as pansies, petunias, and marigolds for instant seasonal colour.
- Select flower seeds for direct sowing or start seedlings indoors.
- Group plants based on sunlight needs – Full sun, partial sun, or shade-loving flowers will thrive better in the correct conditions.
- Use Flower Seeds for budget-friendly planting and succession gardening.
Pro Tip: When dividing perennials, ensure each section has a healthy root system and at least 3-5 growing points. Water them immediately after transplanting to help them establish quickly.
Section 2: Essential Lawn Care Tasks for Spring
A lush, healthy lawn doesn’t happen on its own—it requires strategic care and attention, especially in early spring when grass begins to awaken from winter dormancy. Spring lawn care is about more than just mowing; it involves clearing debris, top dressing, overseeding, fertilizing, and ensuring strong root development. These key tasks set the foundation for a resilient, green lawn throughout the growing season.
Spring is also the best time to repair winter damage, thicken thinning grass, and eliminate compacted soil issues before the heat of summer arrives. Whether you're revitalizing a struggling lawn or maintaining a healthy one, follow these expert-backed strategies for optimal spring lawn care.

2.1 Lawn Cleanup & Preparation
After months of winter snow, ice, and freezing temperatures, your lawn will likely be cluttered with leaves, twigs, and dead grass. Proper cleanup is the first step toward a healthy, vibrant lawn in spring.
Why Spring Cleanup Is Important
- Removes winter debris that can smother grass and cause disease.
- Prepares the soil for aeration and top dressing.
- Encourages better air circulation and sunlight exposure, leading to healthier grass growth
✅ Spring Lawn Preparation Checklist:
- Clear Depris - Use a sturdy Garden Rake to remove dead grass, sticks, and leaves that have accumulated over winter.
- Dethatch compacted areas – If your lawn has a thick layer of thatch (more than ½ inch), use a dethatching rake or power dethatcher.
- Aerate heavy clay soil – Compacted soil prevents water and nutrients from reaching roots. Use a core aerator to create small holes, allowing oxygen, water, and nutrients to penetrate deeper.
Pro Tip: If you notice matted-down areas of grass that remain brown even after raking, it could be snow mold damage—a common fungal disease in early spring. Dethatching and improving airflow will help the grass recover.
2.2 Top Dressing: The Foundation for a Healthy Lawn

One of the most important yet overlooked lawn care steps is top dressing. Adding a thin layer of organic matter over your lawn improves soil quality, corrects uneven areas, and enhances root development.
Why Top Dressing Is Essential
- Adds organic matter, improving soil structure and drainage.
- Fills in small dips and depressions for an even lawn surface.
- Breaks down thatch naturally, reducing disease risks.
- Encourages deeper root growth, making grass more drought-resistant.
✅ How to Top Dress Your Lawn Effectively:
- Choose a high-quality top dressing mix – Use Top Dressing Soil, which contains nutrient-rich compost, sand, and loam for optimal growth.
- Apply a ¼ - ½ inch layer evenly over the lawn.
- Spread using a rake – Use a leveling rake to distribute top dressing into the existing soil.
- Water lightly to help the material settle into the soil.
Pro Tip: For best results, apply top dressing immediately after aeration—this ensures better soil integration and improved root contact.
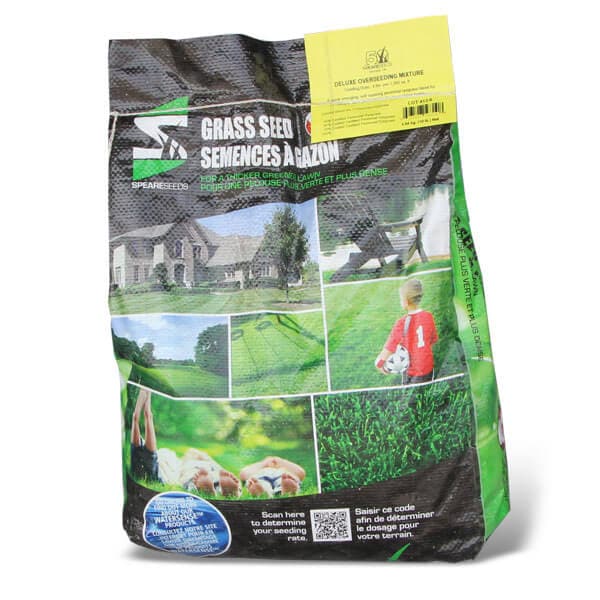
2.3 Overseeding for a Thicker, Healthier Lawn

After top dressing, overseeding is the next crucial step. Overseeding fills in bare patches, thickens thin grass, and introduces newer, more resilient grass varieties. It also helps crowd out weeds naturally, reducing reliance on herbicides.
Why Overseeding in Spring Works
- Improves lawn density, making it more resistant to weeds.
- Repairs winter damage and bare spots.
- Introduces disease-resistant grass varieties.
✅ Steps to Overseed in Spring:
- Choose the right Overseeding Grass Seed – Select a blend suited for your lawn’s sunlight exposure (full sun, shade-tolerant, or high-traffic areas).
- Mow and bag clippings – Cut the grass shorter than usual (1.5 inches) before seeding
- Aerate for better seed-to-soil contact – Overseeding after aeration ensures seeds penetrate deeper.
- Spread seeds evenly – Use a broadcast spreader for even coverage.
- Lightly rake the area – This helps incorporate seeds into the soil for better germination.
- Water consistently – Keep the soil moist but not soggy until seeds germinate.
Pro Tip: Spring seeding requires consistent watering (twice daily) to prevent seeds from drying out.
2.4 Fertilizing for Strong Growth

After overseeding, applying a slow-release fertilizer gives your lawn the nutrients it needs to develop strong roots and lush green blades.
Why Spring Fertilization Matters
- Restores nutrients lost over winter.
- Promotes deep root development for summer resilience.
- Encourages faster, thicker green-up.
✅ Spring Fertilization Tips:
- Choose the right fertilizer – Use a balanced Lawn Fertilizer with nitrogen (N), phosphorus (P), and potassium (K).
- Time it right – Apply fertilizer after your lawn has been mowed 2-3 times (typically late April or early May)
- Use a spreader for even distribution – Walk in straight lines to avoid uneven patches.
- Water after application – This helps nutrients penetrate the soil for better root absorption.
Pro Tip: Avoid applying too much nitrogen early in spring, as it can lead to excessive top growth with weak root development.
Section 3: Enhancing Your Landscape with Mulch & Borders
A well-designed garden isn’t just about healthy plants—it’s also about maintaining soil health, reducing weeds, and creating a polished appearance. Two essential elements of landscape maintenance that help achieve these goals are mulching and garden edging.
Mulch serves multiple functions, from retaining moisture and improving soil structure to protecting plant roots and enhancing garden aesthetics. Meanwhile, well-defined borders using stones or edging materials give a garden a professional, maintained look while keeping flower beds and pathways separate from the lawn.
Below, we’ll explore the best mulching techniques and how to install garden edging to keep your landscape beautiful and low-maintenance.
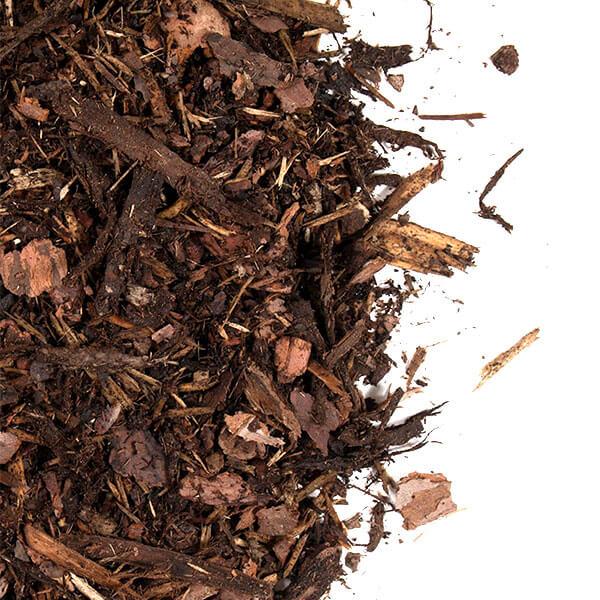
3.1 The Benefits of Mulching in Spring

Mulching is one of the easiest and most effective ways to improve garden soil health and appearance. By adding a layer of organic or inorganic material over the soil surface, mulch acts as a protective barrier, keeping weeds at bay, locking in moisture, and regulating soil temperature.
Why Mulching in Spring Is Essential
Spring is the best time to apply mulch because:
- It prepares soil for the growing season by improving moisture retention and fertility.
- It suppresses early-sprouting weeds, reducing the need for chemical herbicides.
- It protects plant roots from temperature fluctuations, ensuring stronger growth.
- It reduces the need for frequent watering, making your garden more drought-resistant.
✅ Best Practices for Mulching in Spring:
- Apply a 2-3 inch layer of mulch around plants, trees, and shrubs.
- Use organic mulch for slow nutrient release, improving soil health over time.
- Avoid piling mulch directly against plant stems—this can trap moisture and cause rot.
- Remove weeds and water the soil before applying mulch for maximum effectiveness.
- Choose the right type of mulch based on your garden’s needs:
Organic Mulches (Break Down & Improve Soil Over Time)- Cedar Mulch - Naturally repels pests and decomposes slowly.
- Wood Chips - Provides long-lasting weed control.
- Compost - Enriches the soil with nutrients for healthier plants.
- Straw & Grass Clippings – Great for vegetable gardens, improving water retention.
- Decorative Stones - Ideal for pathways, prevents soil erosion.
- Rubber Mulch - Durable and prevents weeds, often used in high-traffic areas.
- Black Mulch - Enhances visual appeal with a polished, modern look.
Mulching is a simple but highly effective way to improve garden health, reduce maintenance, and enhance visual appeal. For a deeper dive into choosing the right mulch, check out our full guide on everything mulch.
Pro Tip: If using mulch around trees and shrubs, create a mulch ring around the base but leave a small gap between the mulch and the trunk to prevent fungal growth and pest issues.
3.2 Defining Garden Borders with Stones & Edging
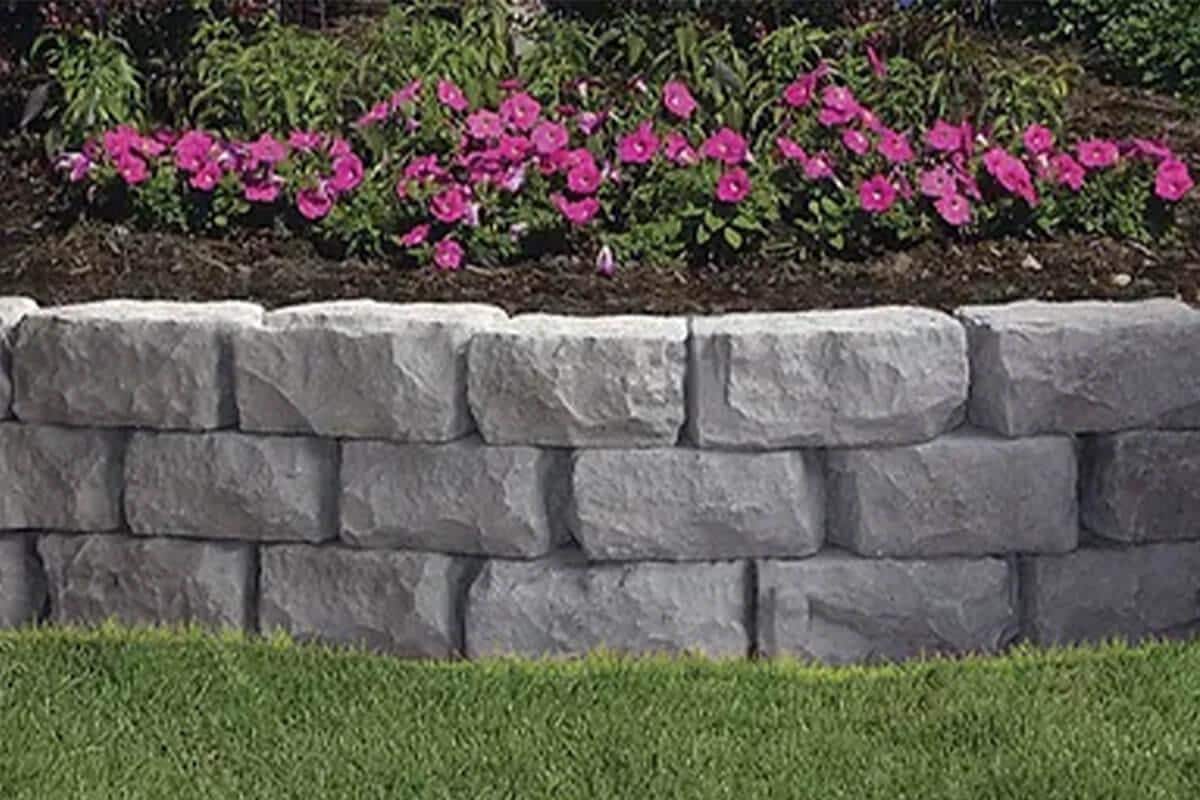
A well-maintained garden isn’t just about healthy plants and soil—it’s also about creating clean, structured lines that separate different areas of your landscape. Installing garden edging and stone borders not only improves aesthetics but also prevents lawn grass from creeping into flower beds and walkways.
Why Garden Edging Matters
- Defines garden spaces by creating a clear boundary between grass and plant beds.
- Prevents soil and mulch erosion by keeping materials in place.
- Makes mowing and trimming easier, reducing the need for constant lawn maintenance.
- Enhances curb appeal by giving your yard a polished, professional look.
✅ Steps to Install Garden Edging:
- Plan the layout – Use a hose or rope to outline the shape of the border before digging.
- Dig a shallow trench – Use a Garden Shovel to dig a 2-4 inch deep trench along the outlined border
- Choose edging materials – Options include:
- Garden Wall Stones for a permanent, structured look.
- Metal or plastic edging for flexibility and easy installation.
- Brick or pavers for a traditional, classic garden feel.
- Install the edging – Place the chosen edging material securely into the trench.
- Backfill and compact soil –Add soil or gravel behind the edging to hold it in place.
Pro Tip: If using stones or bricks, consider adding landscape fabric underneath to prevent weed growth between cracks.

Frequently Asked Questions (FAQ)
When is the best time to start preparing my lawn and garden in the spring?
The ideal time to start spring lawn and garden preparation is when the ground has thawed, and soil temperatures reach at least 10°C (50°F). This is typically in early to mid-spring (March to April, depending on your location).For lawns:
- Begin by removing winter debris and dethatching.
- If soil is compacted, aerate before applying top dressing.
- Wait until soil temperatures consistently exceed 10°C (50°F) before overseeding.
For gardens:
- Test and amend the soil by adding Compost or Premium Soil to improve fertility.
- Prune perennials and shrubs before they start new growth.
- Apply mulch after planting to retain moisture and prevent weeds.
Pro Tip: Avoid working in overly wet soil—compacted, muddy soil can damage plant roots and delay growth.
What Type of Soil Should I Use?
Different soils have unique textures, nutrient levels, and drainage properties, making them suitable for specific applications. Using the correct soil mix ensures optimal plant health and long-term success.Best Soil for Flower & Vegetable Gardens
💡 Use: GardenPro Soil
- A nutrient-rich blend that enhances flower beds, vegetable gardens, and raised planters.
- Improves water retention while allowing for proper drainage.
- Ideal for perennials, annual flowers, vegetables, and herbs.
💡 Use: Compost
- Adds organic matter and beneficial microbes to improve soil fertility and structure.
- Boosts plant health by increasing nutrient availability.
- Best mixed into existing soil or used as a top dressing for garden beds.
💡 Use: VeggiePro Soil
- Specially formulated for vegetable gardens and raised beds.
- Provides light, well-draining soil while maintaining essential nutrients.
- Ensures optimal root development and high crop yields.
Best Soil for Lawns & Lawn Repair
💡 Use: LawnPro Soil
- Perfect for revitalizing lawns, leveling uneven areas, and improving soil health.
- Made from fine organic material, compost, and screened loam to enhance grass root growth.
- Used after aeration and overseeding to boost grass seed germination.
Best Soil for Potted Plants & Container Gardening
💡 Use: Potting Soil
- A light, well-aerated mix designed for indoor and outdoor containers.
- Retains moisture while providing good drainage.
- Contains added nutrients to support plant health over time.
What is the best way to control weeds in the lawn and garden in the spring?
Weeds compete with grass and plants for nutrients, sunlight, and space, so early weed control prevents larger infestations later in the season.Weed Control for Lawns:
- Overseed in early spring – A thicker lawn naturally chokes out weeds.
- Apply pre-emergent herbicide – If you aren’t seeding in spring, use a weed preventer to stop weed seeds from germinating.
- Top dress with organic matter – Healthy soil supports strong grass growth, making it harder for weeds to take hold.
- Maintain proper mowing height – Keep grass 3 inches tall to shade out weed seeds.
Weed Control for Gardens:
- Apply 2-3 inches of garden mulch. Mulch will block the sunlight making it difficult for weed seeds to germinate and grow.
- Hand-pull weeds early before they mature and produce seeds.
- Use landscape fabric under pathways or decorative areas to prevent weed penetration.
How Often Should I Water My Lawn in Spring and Summer?
Many homeowners either overwater or underwater their lawns, leading to shallow roots, disease, and weak grass. Knowing when, how much, and how often to water is key to a healthy, resilient lawn.- Water Deeply, Not Frequently
- Instead of light daily watering, aim for 1 to 1.5 inches of water per week, applied over two to three deep watering sessions.
- Deep watering encourages grass roots to grow deeper, making the lawn more drought-resistant.
- Morning Watering Is Best
- The ideal time to water is between 6:00 AM and 10:00 AM, when temperatures are cooler, and evaporation rates are lower.
- Avoid watering in the evening, as damp grass overnight can lead to fungal diseases
- Adjust Watering Based on Season & Weather
- Early Spring: Water sparingly, as soil retains moisture from snowmelt and rain. Start regular watering only if the grass shows signs of drought stress (wilting, dull color).
- Late Spring/Early Summer: Increase watering to twice per week, ensuring each session soaks the soil to a depth of 6 inches.
- Mid-Summer: Hot weather and dry spells require more frequent watering, especially for newly seeded or overseeded lawns.
- Use the “Footprint Test” to Check for Drought Stress
- Walk across your lawn—if footprints remain visible for more than a few minutes, the grass isn’t bouncing back and needs water.
- Water Newly Seeded Lawns More Frequently
- If you’ve recently overseeded or planted new grass seed, keep the soil moist but not soggy. Water twice a day until seeds germinate.
How often should I fertilize my lawn in the spring, and what type of fertilizer should I use?
Fertilizing in spring replenishes nutrients lost over winter and kickstarts grass growth, but timing and product choice matter.- Apply fertilizer after the first 2-3 mowings – This ensures grass is actively growing and ready to absorb nutrients.
- Use a balanced Lawn Fertilizer – Look for a blend containing:
- Nitrogen (N): Encourages green, leafy growth.
- Phosphorus (P): Supports root development.
- Potassium (K): Enhances overall lawn health.
- Apply evenly with a spreader – Walk in straight lines to avoid over-fertilizing.
- Water lightly after fertilizing – This helps nutrients absorb into the soil for better uptake.